
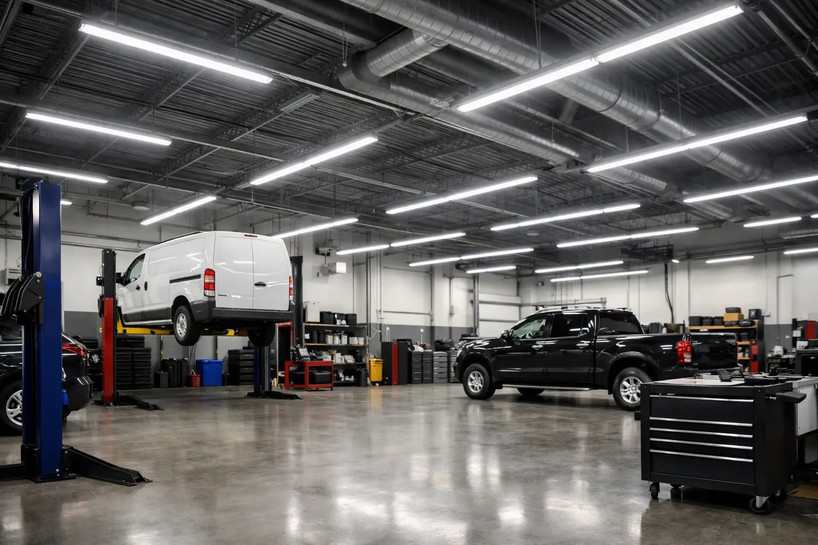
A dark ramp, uneven illumination between parking stalls, and fixtures that fail before a maintenance crew can reach them are not minor garage problems. They affect driver visibility, pedestrian safety, security, liability, and operating costs. The best LED garage lighting is not simply the brightest fixture available. It is the right combination of lumen output, distribution, mounting method, color temperature, controls, and environmental rating for the structure.
For commercial parking garages, service garages, and covered vehicle areas, the purchase decision starts with the application. An open-sided parking deck has different exposure and lighting needs than a concrete-enclosed garage or an active maintenance bay. Selecting fixtures by wattage alone can leave dark zones, create excessive glare, or waste energy where occupancy controls would do the job better.
What Defines the Best LED Garage Lighting?
Commercial-grade LED garage fixtures should provide useful, consistent light over driving lanes, parking areas, stairwells, entrances, and service zones. Useful light matters more than a high lumen number on a specification sheet. A fixture's optical distribution determines where those lumens land, while mounting height and spacing determine whether the area is evenly illuminated.
For general parking levels, many projects use LED garage canopy fixtures, low-bay fixtures, linear strip fixtures, or vapor-tight fixtures. The best choice depends on ceiling construction, fixture spacing, exposure to moisture and dust, and the required lighting level. A low-profile canopy fixture may suit a typical concrete deck, while a vapor-tight linear fixture can be a better fit for wash-down areas, utility corridors, or locations with higher moisture exposure.
A dependable fixture should also be built for the environment. Look for a suitable IP rating where water or dust is present, a durable housing, impact resistance where vehicle damage is possible, and a temperature range that matches local conditions. In open garages, weather resistance and corrosion protection are especially important because the fixtures may be exposed to wind-driven rain, humidity, salt, and temperature swings.
Start With the Garage Zone, Not the Fixture
A garage is rarely one uniform lighting application. Treating every level and area the same often increases fixture count without improving visibility. Break the project into zones before comparing products.
Driving lanes need broad, uniform coverage so drivers can see pedestrians, directional markings, curbs, and vehicles entering from adjacent stalls. Parking areas need enough vertical and horizontal illumination to support wayfinding and security without producing harsh glare through windshields. Ramps deserve extra attention because changing daylight conditions, slope, and turning movements make contrast more difficult for drivers to manage.
Stairwells, elevator lobbies, payment areas, entrances, and pedestrian paths have their own requirements. These areas may require higher light levels, emergency illumination, occupancy sensing, or specific fixture forms. Service bays are another category entirely. Technicians need high color quality and adequate task lighting to inspect components, read labels, and work safely around vehicles.
For an upgrade project, document existing mounting heights, fixture locations, voltage, circuiting, and any controls already in place. This information prevents a common mistake: replacing an old 250-watt or 400-watt fixture with an LED equivalent based only on energy use. The replacement must also meet the actual coverage and light-level needs of the space.
Match Lumens and Optics to Mounting Height
Wattage is useful for estimating electrical load, but lumens and photometric performance should drive the lighting plan. A 40-watt LED fixture and a 60-watt LED fixture can have very different lumen packages, efficacy, distributions, and delivered light on the floor.
For lower garage ceilings, a fixture with a wide distribution can provide even coverage across parking stalls and lanes. At higher mounting heights, higher lumen output or a more controlled distribution may be necessary to maintain adequate light levels. Fixtures placed too far apart can create pools of light and dark gaps. Fixtures with an overly narrow beam can produce distracting bright spots, particularly on polished concrete or wet surfaces.
Photometric layouts are valuable for new construction and larger retrofit projects. They account for fixture output, mounting height, spacing, surface reflectance, and the geometry of the garage. A layout also makes it easier to compare a lower-wattage option with a higher-output option based on actual foot-candle results rather than assumptions.
When reviewing a fixture, pay attention to delivered lumens, distribution pattern, mounting orientation, and lens type. Clear lenses may provide more output, while frosted or diffused lenses can reduce visible glare. Neither is automatically better. The right choice depends on the ceiling height, sightlines, and how close occupants are to the fixture.
Choose Color Temperature for Visibility and Comfort
Most commercial garage projects land between 4000K and 5000K. A 4000K LED provides a neutral white appearance that works well in enclosed garages, mixed-use buildings, and areas where visual comfort is a priority. A 5000K fixture delivers a cooler, crisper white light that can improve the perception of brightness in open decks, ramps, and security-sensitive areas.
The trade-off is simple: cooler light can make an area feel brighter and more alert, but it may look harsh in enclosed or customer-facing spaces. If the garage connects directly to a residential lobby, office building, retail area, or hospitality property, 4000K may be the more balanced option. Selectable color temperature fixtures can be useful where final preferences are not confirmed, but the selected setting should be documented at installation for consistency across the project.
Color rendering also matters in service garages and maintenance areas. A higher CRI helps technicians distinguish wire colors, paint tones, fluid leaks, labels, and component markings. For routine parking areas, standard commercial CRI is often sufficient, but task-focused work areas may justify a higher-CRI specification.
Use Controls Where They Reduce Real Operating Cost
Garage lighting often operates for long hours, making controls a practical way to reduce energy consumption without compromising safety. Occupancy sensors can bring fixtures to full output when vehicles or pedestrians enter an area and reduce output during low-traffic periods. Daylight harvesting may also be effective near open walls, top decks, and entrances where daylight provides meaningful illumination.
However, controls must be configured for the application. Aggressive dimming or short time delays can make users feel that the garage is underlit. In parking structures, a dim-to-level setting is often preferable to switching fixtures completely off. A low background light supports security and wayfinding, while full output activates as traffic approaches.
For larger facilities, networked controls can provide scheduling, monitoring, grouping, and energy reporting. They can be worth the added cost where the garage operates around the clock or has frequent usage changes. For a smaller enclosed garage, integral microwave or PIR occupancy sensors may provide a simpler and more economical solution.
Do Not Overlook Emergency and Egress Lighting
General garage fixtures are not a substitute for required emergency lighting and exit signage. Egress routes, stair enclosures, exit doors, and designated paths must be addressed as part of the code-compliant lighting plan. Depending on the facility and local authority requirements, this may include LED emergency lights, exit signs, battery backup fixtures, or emergency drivers integrated with normal lighting.
Battery backup can be a practical option for maintaining illumination in selected areas during an outage, but it should be specified around the required emergency operation time, fixture load, and testing access. Exit signs should be chosen for the jurisdiction and mounting condition, including any local approval requirements. A garage renovation is a good time to verify that aging emergency units, damaged exit signs, and incomplete egress coverage are corrected rather than carried forward.
Installation Details That Affect Fixture Life
A quality LED fixture cannot overcome poor installation conditions. Verify voltage compatibility before ordering, especially when a project includes 120-277V circuits, 347-480V systems, or mixed electrical infrastructure. Confirm mounting hardware, junction box compatibility, pendant requirements, and conduit entry locations so the installation does not require field improvisation.
Surge protection is worth considering in garages with long branch circuits, exposed electrical systems, or locations prone to utility disturbances. Open parking decks may also benefit from fixtures designed to withstand vibration, corrosion, and regular temperature changes. For fixtures installed near vehicle lanes, consider mounting locations and guards that reduce the chance of impact damage.
Maintenance access should remain part of the decision. LED reduces relamping frequency, but drivers, sensors, emergency batteries, and fixtures can still require service. Standardizing on a manageable number of fixture types and keeping records of wattage, CCT setting, sensor configuration, and replacement parts makes future maintenance faster.
Build the Specification Around the Facility
The right garage lighting package may include low-profile canopy fixtures on parking levels, vapor-tight linear lights in damp utility areas, higher-output fixtures on ramps, and dedicated task lights in service bays. That is not overcomplication. It is a practical response to different operating conditions within the same property.
Last Stop Lighting can help contractors and facility buyers compare commercial fixture options by wattage, lumens, voltage, color temperature, controls, and mounting requirements before ordering. For larger projects, start with the garage layout and operating needs, then select fixtures that deliver the coverage, durability, and serviceability the facility will still need years after installation.