
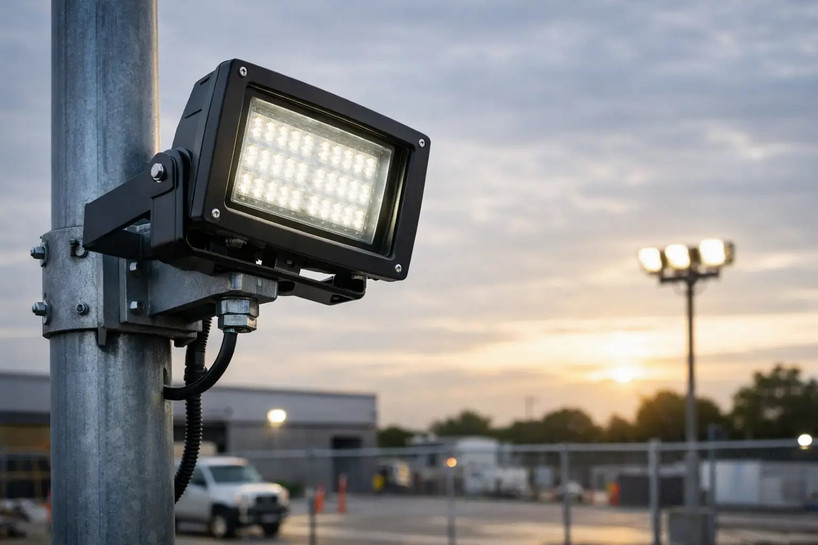
A floodlight can have the right lumen package and still perform poorly if it is mounted on the wrong surface, aimed without a plan, or connected through an unprotected wiring point. This commercial floodlight mounting guide focuses on the decisions that affect safety, usable light, fixture life, and maintenance access at parking areas, loading docks, building perimeters, storage yards, and athletic facilities.
Start With the Mounting Surface and Load Path
The fixture mount is only as dependable as the structure behind it. Before selecting a bracket or drilling a hole, confirm what will carry the floodlight, the conduit, and the wind load. A masonry wall, structural steel column, wood-framed facade, lighting pole, and roof parapet each require a different attachment method and may have different limitations.
For wall installations, fasteners must engage a sound structural substrate, not thin siding, exterior insulation, or deteriorated masonry. Use an approved exterior-rated junction box or mounting plate where required, and make sure the box can support the fixture weight. A large LED floodlight may be lighter than an older metal-halide unit, but its housing and mounting yoke still create leverage against the wall when it is extended or angled outward.
Pole-mounted floodlights require more than a compatible slip fitter or tenon adapter. Review the pole's available tenon size, mounting height, wind zone, pole material, and EPA rating. Fixture effective projected area matters because wind loading can become the deciding factor on high-output floodlights with broad housings. On a new installation, the pole, anchor bolts, foundation, bracket, and fixture should be evaluated as a system. On a retrofit, do not assume an existing pole designed for a small HID head can safely accept multiple larger LED fixtures.
Commercial Floodlight Mounting Guide: Match the Mount to the Application
The mounting option controls both where the fixture can go and how precisely it can be aimed. Choose the mount before finalizing the fixture, especially when replacing an existing unit with a different housing style.
A trunnion or yoke mount is common for walls, flat roofs, structural members, and ground-level equipment pads. It offers broad vertical adjustment and works well when the fixture needs to be aimed downward or across an open area. The trade-off is that the mounting surface must handle the fixture's offset load, and the installer needs enough clearance to adjust and tighten both sides of the yoke.
Slip fitter mounts are typically used on round tenons and pole tops. They are practical for parking lots, yards, and sports applications because the fixture can be aimed after it is secured to the tenon. Confirm the exact tenon diameter and tightening method. A loose slip fitter can shift over time, change the aiming angle, and create a maintenance issue.
Knuckle mounts and adjustable arms are better suited to smaller floodlights, wall boxes, signs, building facades, and targeted security lighting. They provide useful aiming flexibility but are not interchangeable with every junction box or fixture family. Check the manufacturer’s mounting pattern, fixture weight rating, and whether the mount is included or ordered separately.
For floodlights installed under eaves or on canopies, verify clearances around the driver compartment and heat sink. LED fixtures run cooler than HID lamps at the beam source, but drivers and heat-dissipation surfaces still need airflow. A fixture pressed tightly into an enclosed soffit may not operate as intended or may be difficult to service later.
Establish the Light Plan Before Drilling
Mounting height, beam distribution, and aiming angle work together. Installing the fixture first and trying to solve coverage afterward usually leads to glare, dark corners, or unnecessary wattage.
Start with the task area. A loading dock needs vertical illumination on doors, trailers, steps, and personnel paths, not just a bright patch of pavement. A perimeter needs controlled light along the fence line and at access points. A parking area needs even horizontal coverage with manageable glare for drivers and pedestrians.
Narrow beam floodlights concentrate output over a longer throw and are useful for signs, distant property lines, or sports targets. Wide beams cover more area at shorter mounting distances but can waste light beyond the property line if aimed carelessly. The higher the mounting position, the more likely a fixture will need a focused distribution to maintain useful light levels at the ground.
Avoid selecting by wattage alone. Compare delivered lumens, beam angle or distribution, mounting height, color temperature, controls, and the condition of the existing lighting. A 5000K floodlight can improve visual contrast in an active commercial yard, while 3000K or 4000K may be more appropriate where warmer appearance, reduced glare perception, or local outdoor-lighting requirements are priorities.
Protect Wiring and Weather Entry Points
Commercial floodlight failures often start at the wiring connection, not the LED board. Every exterior connection point needs to remain dry, mechanically protected, and accessible for service.
Use wiring methods and components rated for the environment and approved by the authority having jurisdiction. That includes properly sized conduit, listed fittings, wet-location-rated boxes, intact gaskets, and strain relief where the fixture design requires it. Seal unused openings with listed plugs rather than tape or temporary caps.
Confirm the fixture voltage before installation. Many commercial LED floodlights are rated for 120-277V, while others are 347-480V or use a dedicated driver configuration. A universal-voltage fixture can simplify replacement work, but it does not eliminate the need to verify the branch circuit. Match the supply voltage, grounding method, overcurrent protection, and conductor sizing to the fixture instructions and applicable electrical code.
If the project uses photocells, occupancy sensors, time clocks, or a building management system, plan the control wiring before mounting. A photocell placed beneath an overhang or too close to the floodlight’s reflected output can cycle incorrectly. For motion-controlled security lighting, make sure the sensor has a clear view of the approach path and is not triggered constantly by traffic, trees, or adjacent activity.
Aim for Coverage, Not Maximum Brightness
A floodlight pointed straight outward may look powerful from the ground, but it usually creates glare and sends light where it is not needed. The practical starting point is to aim the fixture downward toward the task area, then adjust gradually while viewing the site from normal approach routes.
For perimeter and parking applications, keep the brightest portion of the beam inside the property and away from neighboring windows, public roads, and driver sightlines. Add shielding or choose a fixture with a more controlled distribution when aiming alone cannot control spill light. This is often a better answer than reducing output after installation.
At loading docks, aim one fixture to cover the door face and staging area, then use a second fixture or a different distribution for the vehicle approach if needed. One high-wattage unit may create hard shadows behind trailers or dock equipment. Layered lighting can produce better visibility while allowing each fixture to operate at a lower, more useful output.
Make final adjustments after dark. Daytime aiming confirms the mechanical range, but it cannot show glare, shadowing, reflected light, or actual beam overlap. Tighten all adjustment hardware after aiming and recheck it after the site has experienced normal vibration and weather.
Commission the Installation Before Turning It Over
A proper commissioning check catches problems while the lift, tools, and installer are still on site. Energize the circuit and verify that every fixture starts correctly, stays on without flicker, and responds properly to its selected control mode. Check photocell orientation, sensor detection zones, dimming settings, and any selectable wattage or color temperature switches before the fixtures are placed into regular service.
Inspect each mounting point for loose hardware, incomplete gasket compression, exposed conductors, unsupported conduit, and openings that could admit water. Confirm that fixtures are reachable for future driver replacement or cleaning. A floodlight mounted where no lift can safely access it may be inexpensive to install and costly to maintain.
Document fixture model numbers, voltage, wattage settings, color temperature, mounting height, and control settings. This record helps maintenance teams order a matching replacement and prevents confusion when a selectable fixture is adjusted years later.
The best installation is not the one that simply turns on at night. It is the one that puts light exactly where employees, visitors, vehicles, and security cameras need it, while keeping the fixture secure and serviceable for the long haul. For projects with multiple mounting conditions or uncertain replacement specifications, Last Stop Lighting can help commercial buyers narrow the fixture, mount, and control options before materials reach the jobsite.